A high-fidelity prototype is essentially a near-final version of your product, much like taking a test drive before enjoying the final bite. Its primary purpose is to identify even the tiniest flaws within the product. In the case of UX/UI, it’s a way for the designers to get their feedback from real users, knowing if they can operate it seamlessly.
Now, here's the key point to remember- the more realistic and interactive your prototype is, the more authentically users will engage with it. This, in turn, ensures that users can gain the maximum benefit from the actual application when they eventually use it.
To help you make the most of these benefits, I'll walk you through the steps necessary to create a high-fidelity prototype, along with some useful tips.
To create a high-fidelity prototype, you need to begin with a low-fidelity version. This ensures a thorough process. Follow these steps for a comprehensive guide.
Storyboarding is an iterative interaction design method that consists of a series of sketches or images to illustrate the resolution of a user scenario from start to finish. This technique facilitates effective collaboration within your multi-disciplinary team, resulting in user-centric and user-friendly designs.
This approach draws inspiration from the film industry, where a storyboard, or comic, of a scene, is created to assist directors and cinematographers in visualizing the scene's appearance and addressing any potential issues prior to production.
These low-fidelity prototypes are created early in the design process to present design concepts and gather feedback. Before creating detailed functional specifications, storyboards serve as a valuable tool for refining and testing ideas.
To create a clear storyboard, ensure you:
The mood-boarding technique is popular in the design field and among many creative professionals. In design, a mood board, whether digital or physical, serves as a canvas where people gather various items like photos and textures to visualize their ideas and concepts.
In simpler terms, it's a collection of all the inspirations you've gathered while brainstorming designs and concepts. This includes typography, color palettes, relevant images, graphic elements, shapes, symbols, design patterns, and style guides.
Unlike wireframes and prototypes, mood boards don't adequately represent a future project. Instead, they are meant to convey a product's desired mood and emotions.
Finally, this step is all about turning the low-fidelity prototype into the high-fidelity. You roughly need to follow these steps to do so.
Begin by outlining the skeletal framework with boxes and rough shapes. They are devoid of color, font choices, logos, or other real design elements that distract from the site's structure.
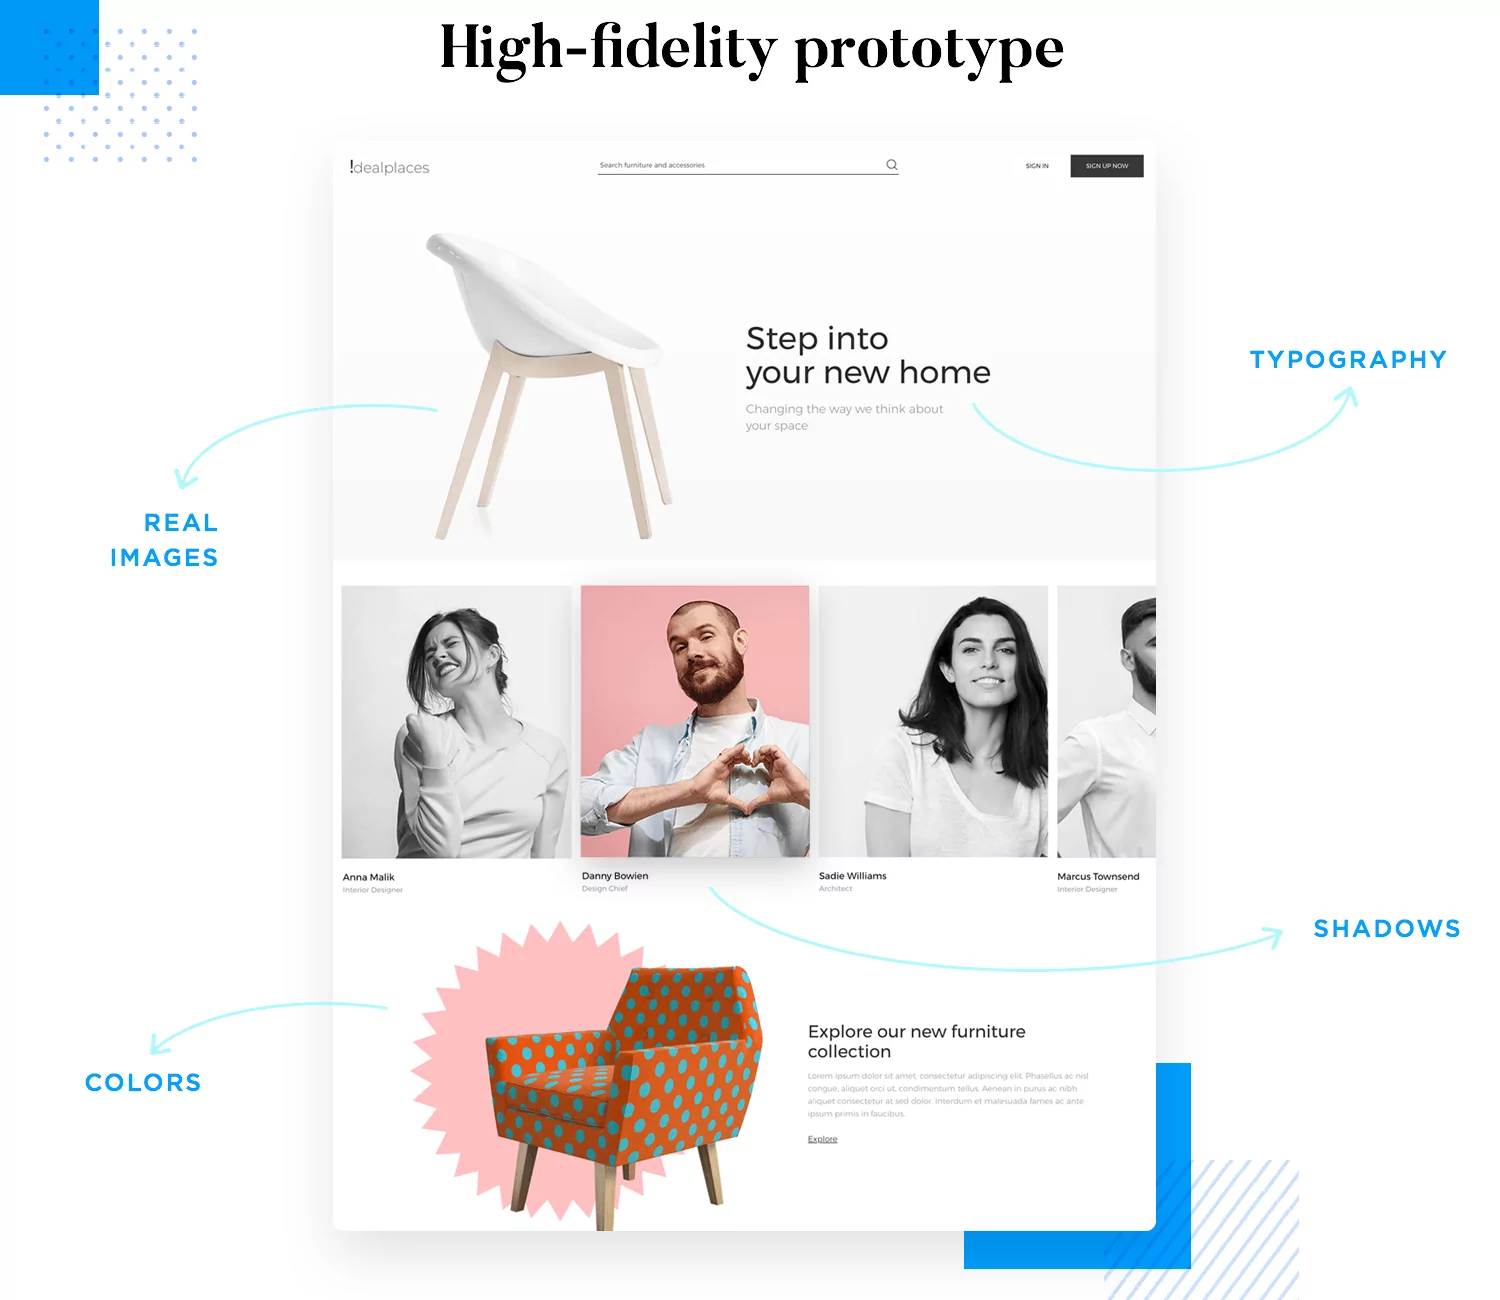
Now, give life to these prototypes. To add detail to wireframes, add color, typography, images, and other visual design elements. You will find these elements on the mood board you created in the previous step.
Start with simple initial interactions. You can even include interaction guidelines in your design system for easy copying and pasting by team members. These straightforward interactions not only save time but also maintain consistency, leading to a clean and cohesive end product. You can always revisit and refine interactions as needed.
When creating high-fidelity prototypes, it's common to make mistakes. The following points will help you stay on track during this process.
These are a few useful suggestions you can follow to avoid making mistakes while creating a high-fidelity prototype.
Designing applications without a clear grasp of their flow is a mistake that can lead to wasted time and resources. To ensure that users see the information you want them to and take the necessary actions, it's crucial to start by knowing the flow.
Here's how to do it:
When creating designs and high-fidelity prototypes, it's important not to rely solely on "Lorem Ipsum," the most commonly used placeholder text in design. Genuine usability testing relies on real content, as real users need actual information to understand and interact with the prototype effectively.
Instead of using placeholder text, we should aim to incorporate meaningful content that helps users grasp the information we intend to convey. If the original content isn't available yet, we can consider using something similar as a temporary solution.
When you're in the planning and testing phase, it's totally normal to have a bunch of good ideas swirling around at the same time. Even though there's typically just one way to make the product, it's not always crystal clear which idea is the winner.
One neat trick is to create high-fidelity prototypes for each of these ideas. This lets you get hands-on and really compare them. You can see how they measure against each other and determine which fits the product specs best.
But here's the thing- this approach isn't always a walk in the park. Before you jump into experimentation mode, take a step back and ask yourself if you've got the time and money to spare for this process.
Yes, we still have work to do! Many flaws in the prototype will become apparent during the initial user test. These include issues with the flow, unclear button labels, missing components, typos, and other errors.
This is a common occurrence and won't significantly impact the user test. So, don't worry and start addressing these issues.
Prioritize the fixes based on their importance and the effort required. Begin by fixing the most critical issues and then tackle the remaining minor ones. This approach will save time.
Ensure that your modifications are synchronized with the prototype. However, avoid making changes while a test is running, as it could potentially damage the prototype. Also, refrain from unnecessary modifications; resist the temptation to make constant adjustments.
Prototyping really shines for businesses because it lets you get user feedback early on and spot issues right from the start of planning. However, don't write off traditional development just yet – it has its own strengths.
The bottom line here is that whether you go with prototyping or the traditional route, doing it poorly can mess up the user experience, while doing it right can make it awesome. That's where the old saying "A poor craftsman blames his tools" comes into play.
Your decision should consider your project's goals, constraints, budget, deadlines, and stakeholders.
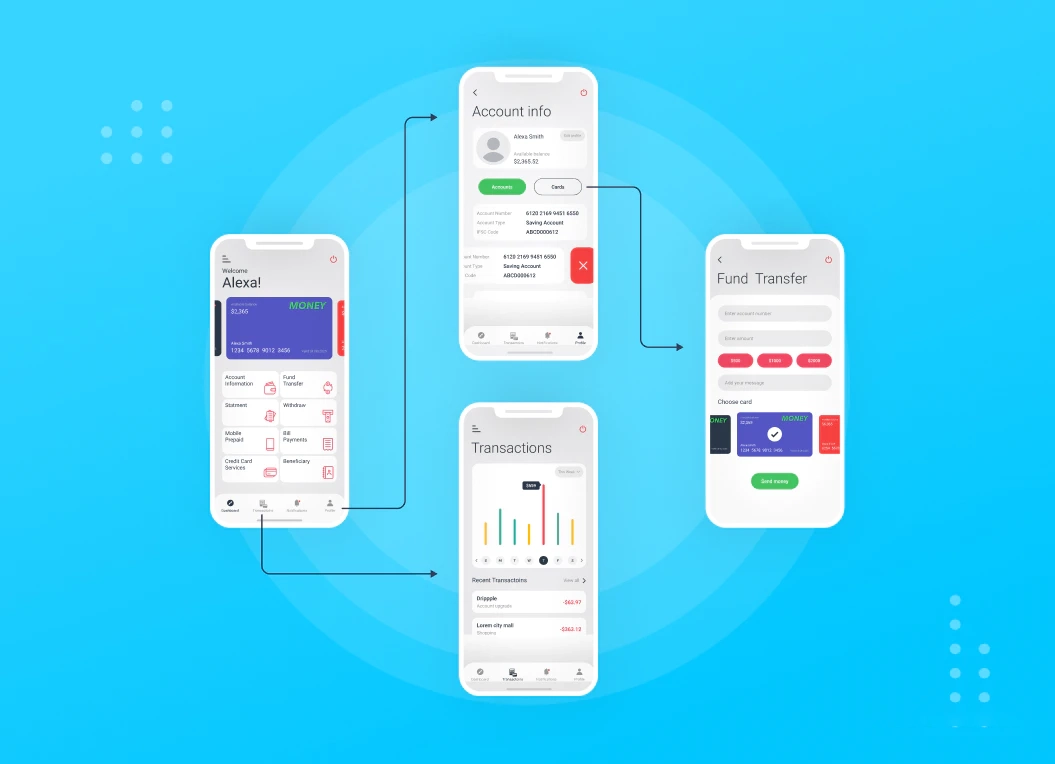
A high-fidelity prototype for a detailed and realistic product representation. It allows designers to test and refine the user experience, identify potential issues, and gather user feedback before the final product is developed. They are particularly useful for testing complex interactions and features, as they provide a more accurate representation of the final product than low-fidelity prototypes. They can also help stakeholders visualize the final product and make informed decisions about its development.
Examples of high-fidelity prototypes include a high-fidelity flight-booking app, an eCommerce app in tablet view, and a high-fidelity IKEA website. It contains details like error messages, inline validation for form design, tables, grids, or list UIs that users can filter and sort, and the ability to store and reproduce data across various other screens. The main difference between low-fidelity and high-fidelity prototypes is the degree of detail involved.
High-fidelity wireframes are ideal for sharing design concepts with clients, stakeholders, and development teams. They are visually engaging, reducing confusion and fostering clarity in communication. These detailed wireframes also serve as comprehensive design documentation, serving as a definitive reference for the project's appearance and functionality. Stakeholders can gain a clearer understanding of the design, facilitating more precise feedback.


An Experience Design Agency focusing on building functional, simple, human-centered digital products for future.